
Dessert Recipes That Don’t Feel Like Diet Food: Sweet Treats You’ll Actually Enjoy
For a long time, I lived in a world of “sad” desserts. I used to think that if I wanted to stay on track with my health goals, my only options were a single square of 90% dark chocolate or a bowl of plain berries. I would find myself staring longingly at the dessert menu, feeling deprived, only to eventually cave and eat something processed that left me feeling sluggish the next day. I discovered that the “all-or-nothing” approach to sweets was actually my biggest hurdle. I realized that when you use nature’s most indulgent ingredients—like creamy nut butters, raw cacao, and medjool dates—you can create desserts that are actually more satisfying than the “real” thing.
I’ve since learned that the best desserts are those that provide “functional sweetness.” I learned that by pairing natural sugars with fiber and healthy fats, you can enjoy a treat that tastes like a luxury but keeps your blood sugar stable. It’s about moving away from the “diet food” mentality and returning to the joy of real, decadent ingredients that nourish your soul while respecting your body.
This guide explores the art of the “high-vibe” dessert. We’ll look at why “fat + fiber” is the golden rule for sweets and share three recipes that are so delicious, you’ll forget they’re actually good for you.
The Golden Rule: Fat, Fiber, and Flavor
The reason “diet” desserts usually feel unsatisfying is that they lack the biological triggers that tell your brain you’ve had a treat.
1. The “Mouthfeel” of Fat
Fat is what gives traditional desserts their richness. When you remove fat (like in “low-fat” cookies), the brain feels cheated.
Personal Tip: Don’t be afraid of coconut cream or almond butter in your treats. These healthy fats are what provide that velvety “melt-in-your-mouth” texture. I find that I only need a few bites of a fat-rich dessert to feel completely satisfied, whereas I could eat a whole box of “fat-free” snacks and still be hungry.
2. Fiber as a Buffer
Natural sweeteners like dates or maple syrup are still sugars, but when they come packaged with fiber, the impact on your insulin is much lower.
Personal Tip: I always try to use whole-fruit sweeteners when possible. Medjool dates are my absolute favorite because they taste like caramel but are packed with fiber. It’s a trick I used to survive my “sugar-detox” days, and now it’s just my preferred way to bake!
Recipe 1: 5-Minute “Salted Caramel” Medjool Dates
This is the ultimate low-effort, high-reward treat. It hits every flavor profile: sweet, salty, crunchy, and creamy.
- Prep time: 5 minutes
- Category: No-Bake / Raw
The Ingredients
- 4 Medjool Dates (pitted)
- 2 Tbsp Creamy Almond Butter
- 4-5 Pecan Halves (or walnuts)
- 1/2 tsp Flaky Sea Salt
- Optional: A few dark chocolate chips pressed into the center.
The Instructions
- The Prep: Slice the dates lengthwise and remove the pit to create a “pocket.”
- The Fill: Spoon half a tablespoon of almond butter into each date.
- The Crunch: Press a pecan or a few chocolate chips into the nut butter.
- The Finish: Sprinkle a tiny bit of flaky sea salt over the top.
Personal Tip: Put these in the freezer for 15 minutes before eating. The almond butter gets chewy, and the date takes on a texture almost exactly like a frozen Snickers bar. It’s my go-to “emergency” dessert when I need something sweet right now.
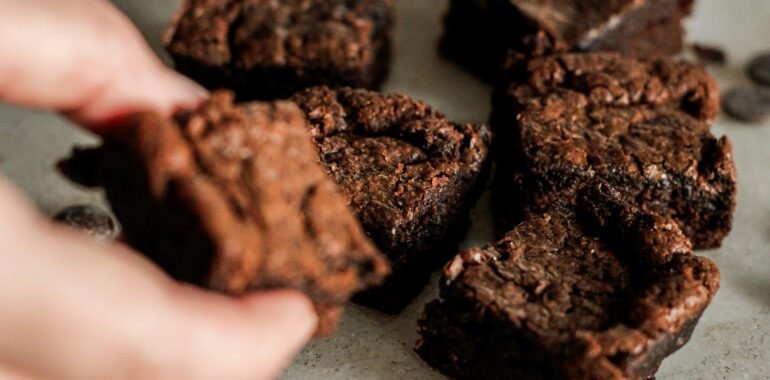
Recipe 2: The “Glow-Up” Almond Flour Brownies
These are fudgy, dark, and decadent. Because they are grain-free and high in protein, they won’t give you that heavy “sugar-hangover.”
- Prep time: 10 minutes
- Cook time: 20 minutes
- Category: Grain-Free / High-Protein
The Ingredients
- 1.5 cups Almond Flour
- 1/2 cup Raw Cacao Powder
- 1/2 cup Maple Syrup
- 1/4 cup Melted Coconut Oil
- 2 Eggs * 1/2 tsp Baking Soda
The Instructions
- The Mix: Whisk the wet ingredients first, then fold in the almond flour, cacao, and baking soda.
- The Build: Pour into a greased 8×8 pan.
- The Bake: Cook at 350°F (180°C) for 20 minutes.
- The Finish: Let them cool completely before slicing to ensure that fudgy texture.
Personal Tip: Add a teaspoon of instant espresso powder to the batter. You won’t taste the coffee, but it deepens the chocolate flavor and makes them taste like they came from a high-end bakery.
Recipe 3: Raspberry-Vanilla “Nice Cream”
A dairy-free alternative to ice cream that uses frozen bananas as a base. It’s creamy, tart, and naturally sweet.
- Prep time: 5 minutes
- Category: Vegan / Fruit-Based
The Ingredients
- 2 Frozen Bananas (peeled and sliced before freezing)
- 1/2 cup Frozen Raspberries
- 1/4 cup Unsweetened Almond Milk
- 1 tsp Vanilla Extract
The Instructions
- The Blend: Place all ingredients into a high-speed blender.
- The Pulse: Pulse until the mixture reaches a “soft-serve” consistency.
- The Serve: Eat immediately for a soft texture or freeze for an hour to scoop.
Personal Tip: Wait until your bananas are “spotted” with brown before freezing. This is when their sugar content is at its peak, so you won’t need any added honey or syrup.
Recipe 4: The PB & Chocolate “Crunch” Disks
This is the perfect healthy answer to a Reese’s Cup. It’s crunchy, salty, and uses dark chocolate to keep the sugar low.
- Prep time: 10 minutes
- Category: No-Bake / Quick Prep
The Ingredients
- 2 Brown Rice Cakes (plain or lightly salted)
- 2 Tbsp Natural Peanut Butter (the drippy kind with just peanuts and salt)
- 2 Tbsp Dark Chocolate Chips (at least 70% cacao)
- 1 tsp Coconut Oil (to help the chocolate melt smoothly)
The Instructions
- The Base: Spread a thick, even layer of peanut butter over the top of each rice cake.
- The Melt: In a small microwave-safe bowl, combine the chocolate chips and coconut oil. Heat in 20-second intervals until melted and glossy.
- The Drizzle: Pour the melted chocolate over the peanut butter layer, spreading it to the edges with a spoon.
- The Set: Place them in the freezer for about 10 minutes until the chocolate shell is hard.
Personal Tip: If you want to feel a little more decadent, start with a chocolate-flavored rice cake as your base for a double-chocolate experience, or a caramel rice cake if you’re craving that “sweet and salty” vibe. I’ve found that using the flavored cakes makes it feel like a fancy dessert from a boutique shop rather than a simple pantry snack!
Reclaiming the Joy of Dessert
Healthy living doesn’t mean saying goodbye to the flavors you love. By using whole-food ingredients and focusing on the balance of fats and fibers, you can create sweet treats that are even more satisfying than their processed counterparts. Dessert should be a moment of celebration, not a source of guilt. Start with the PB & Chocolate Crunch disks tonight—they are the perfect proof that the best things in life are often the simplest.
Final Tip: I treat dessert as a ritual. I’ll put my treat on a beautiful small plate, pour a cup of herbal tea, and sit away from my phone. When you actually focus on the flavor and texture of your dessert, you feel much more “indulged” and less likely to overeat.

I’m Brinley, and I believe in progress over perfection. My holistic journey started when I traded rigid fads for the 80/20 rule and nature-based remedies. I only share advice I’ve lived through—from botanical skincare that fixed my dry skin to easy kitchen hacks. I’m here to help you build a nourished life through small, intentional, and sustainable choices.