
The Surface Architecture: Navigating the Geometry of Modern Beauty Blenders
The way we manipulate product across the skin’s surface is often the deciding factor between a finish that looks like a second skin and one that looks like a heavy, unnatural mask. I spent a significant portion of my early career treating every makeup tool like a hammer, assuming that if I just tapped hard enough, any foundation would eventually cooperate with my pores. It wasn’t until I hit a wall of patchy coverage and wasted product that I began to look into the Application dynamics of hydrophilic foam. I realized that my face isn’t a flat canvas; it is a complex landscape of “Topographical-Peaks” and “Valleys” that require specific geometric solutions. Everything changed when I looked into “Open-Cell Technology” and the role of “Shape-Specific Displacement.” I discovered that by matching the right sponge silhouette to the right facial zone, I could achieve a “High-Fidelity” finish with half the effort.
The goal of this Application Architecture guide is to move away from “Guesswork-Blending” and toward Geometric Precision. By mastering these specific foam anchors, I’ve managed to eliminate the “Caking-Noise” that used to follow my morning routine. When I prioritize the right tool for the right task, I notice a direct improvement in my skin’s textural appearance and a total reduction in product “Absorption-Loss.”
The Science of the “Damp-Bounce” Signal
Why does a specific foam shape outperform a standard brush or fingers for long-term wear? It’s about “Structural-Distribution”:
- The Hydrophilic Pivot: High-quality blenders are made from a material that loves water. When you dampen the sponge, the water fills the “Internal-Matrix,” preventing your expensive foundation from being sucked into the center of the tool.
- The Mimetic Texture: Unlike the flat bristles of a brush, the “Porous-Surface” of a blender mimics the natural texture of human skin. This allows you to “Press-and-Fuse” the makeup into the epidermis.
- The Airbrush Boundary: By using a “Stippling-Motion” (bouncing) rather than a “Wiping-Motion,” you avoid micro-streaks. This creates a “Seamless-Gradient” that allows light to bounce off the skin evenly.
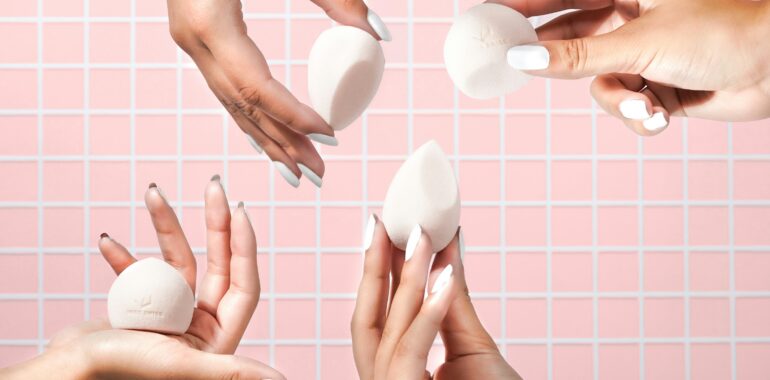
4 High-Integrity Blender Geometries
1. The “Original-Teardrop” Anchor
This is the “Gold-Standard” of the industry. Its lack of hard edges makes it the ultimate tool for a “Global-Blend” across the larger planes of the face.
Personal Tip: I’ve found that the “Dampness-Ratio” is the most important variable here. I don’t just wet the sponge; I wrap it in a clean towel and squeeze it one last time after running it under the tap. This ensures the sponge is “Plump-but-Not-Wet,” preventing the water from diluting the “Pigment-Load” of my foundation.
2. The “Flat-Edge” Sculptor
When I need a more “High-Definition” look, I turn to the flat-bottomed or slanted-edge blender. This geometry is designed for “Mechanical-Compression.”
Personal Tip: If you struggle with your concealer creasing, try the “Stipple-and-Set” method. I use the flat edge to press my concealer in, then immediately dip that same damp edge into loose powder and press it over the top. The residual moisture in the sponge helps the powder “Fuse” with the cream, creating a “Crease-Proof” barrier.
3. The “Hourglass” Ergonomic Vessel
For those who find the standard teardrop difficult to hold, the hourglass shape provides a “Grip-Anchor” that prevents the tool from slipping during a “High-Intensity” blending session.
Personal Tip: I’ve discovered that the “Hourglass” is the best tool for applying cream blush. I use the smaller end to “Micro-Dose” the pigment onto the apples of my cheeks and then use the larger end to “Diffuse” the edges. It prevents the “Clown-Effect” by creating a perfect “Color-Gradient.”
4. The “Micro-Mini” Precision Tool
These are the “Scalpels” of the cosmetics world, designed for “Detail-Work” that a large sponge simply cannot handle.
Personal Tip: I treat my “Micro-Minis” as my “Emergency-Erasers.” If I accidentally get mascara on my eyelid or my eyeliner is too thick, I use a damp micro-mini to “Buff-Out” the mistake without ruining the “Architectural-Base” of my eyeshadow.
The “Blending-Audit”: Tracking Your Finish
I run a quick “Visual-Check” in natural light to ensure my “Application-Data” is resulting in a high-level finish.
- The “Seamless-Signal”: Success looks like a “Blurred-Boundary” at the jawline. If I see a “Tidemark,” I know I didn’t spend enough time on the “Global-Blend” with the rounded base.
- The “Texture-Baseline” Signal: I look for a “Dewy-Integrity.” If my skin looks “Flat-and-Dry,” I know my sponge was too dry or I used too much powder.
- The “Longevity-Signal”: I check my makeup at the 6-hour mark. If the product is “Breaking-Up,” it’s a direct “Data-Point” that I didn’t “Press-and-Fuse” the product into the skin well enough.
The Genesis of a Seamless Glow
Shifting my morning Application toward this geometric model has completely redefined how I experience my daily routine. By choosing “Geometric-Density” over “Brushing-Chaos,” I’ve managed to escape the exhaustion of the “Streaky-Finish” cycle. I’ve found that when my routine is supported by these “High-Integrity” foam anchors, my Decision-Fatigue clears and my skin remains at a “Sustained-Peak” of perfection. This week, I’m leaning heavily into the “Flat-Edge” Sculptor for my under-eyes—it’s the most effective way I’ve found to signal to the world that I am rested, fueled, and ready to thrive.
Final Tip: Don’t view your blender as just a “Sponge.” View it as a “Precision-Instrument.” If you have a day where your makeup feels “Off,” don’t stress—just “Course-Correct” with a clean, damp teardrop and a little bit of “Buffing-Motion.” Your skin is a resilient canvas!

I’m Brinley, and I believe in progress over perfection. My holistic journey started when I traded rigid fads for the 80/20 rule and nature-based remedies. I only share advice I’ve lived through—from botanical skincare that fixed my dry skin to easy kitchen hacks. I’m here to help you build a nourished life through small, intentional, and sustainable choices.